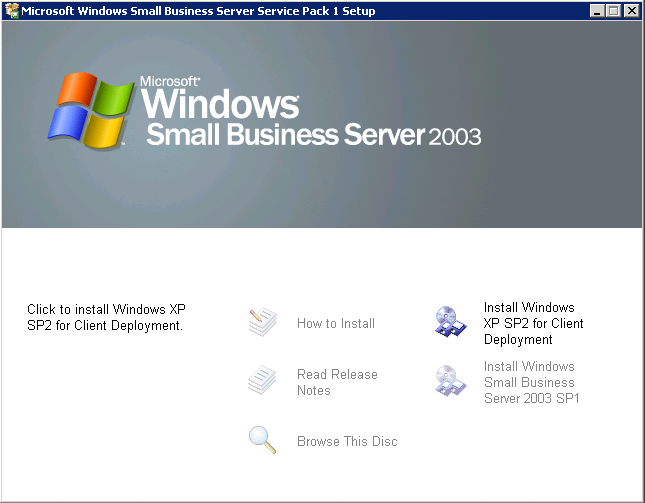
We do not
pretend to know things better then Microsoft by
publishing this document. This document should
be seen as the 'extra hands' every administrator
can use to install and maintain Small Business
Server 2003. As always read the release notes
Microsoft publishes with a service pack and
use this document to assist you installing Small
Business Server 2003 Service Pack 1.
This document was created for the SBS
Community by the SBS-MVP's with Special
Thanks to Mariëtte Knap and Marina Roos for
pulling it all together and making it the
great work you are reading today.
As other issues arise
you will be able to find an updated version
of this document on their site located
at
http://www.smallbizserver.net/Default.aspx?tabid=236
Before you install Small Business Server
2003 Service Pack 1 there are some important
things you should know and you MUST take notice
of them. You should not install the Service
Packs before you have checked this list. Take
your time preparing the installation and read as
much as you can. As always you must have a
working backup of your system before you install
a service pack. More information on how to
backup and restore your server can be found
here: How to backup and restore your SBS
2003 server.
Installing the Service
Packs can take up to 4 hours under normal
circumstances. You should not rush to install
the Service Packs but make a plan. I do always
install Service Packs on a Friday night or
during weekends. If something goes wrong you
have enough time to correct possible
problems.
It is
really simple. If you install Windows Server
2003 Service Pack 1 only, you will end up with a
lot of stuff not working because those are
specific to SBS 2003. When you install Small
Business Server 2003 Service Pack 1 all the
specific SBS 2003 wizards (and a lot
more) are updated so that they can work
with Windows Server 2003 SP1 installed.
Conclusion is that now SBS 2003 SP1
is available you must install Windows
Server 2003 SP1 and all other service packs
discussed in this document. The effects of
installing Windows Server 2003 Service Pack 1
without installing Small
Business Server 2003 Service Pack 1 are
described in Windows Small Business Server 2003
and Windows Server 2003 SP1 Known Issues.
Service pack 1 is a set of several
updates to almost all of the server components
of Small Business Server 2003 including specific
SBS components like the Internet Connection
Wizard (CEICW). It can either be downloaded or
you can order the CD's from Microsoft. It
contains the following parts:
- Windows Server 2003 SP1
- Exchange Server 2003 SP1
- Windows SharePoint Services SP1
- Windows Small Business Server 2003 Update
KB891193 for Windows XP Service Pack 2
- Windows Small Business Server 2003
SP1
The above mentioned service packs can be
installed on Small Business Server 2003
Standard. If you are the proud owner of Small
Business Server 2003 Premium you can
install:
- ISA 2004 SP1
- SQL 2000 SP4
You will not be able to download the Premium
updates for SBS 2003 but you can order the CD
from this link: https://www.microsoft.upgrade.com/sbs/.
- DELL
- HEWLETT PACKARD
- COMPUTER ASSOCIATES
ARCSERVE
- Any Arcserve backup using the VSS Snapshot
option will fail after the installation of
Windows Server 2003 SP1. This is a known issue
with CA. We are working with them on it and will
update everyone as soon as they come up with a
patch or workaround. It's WS03 SP1, not SBS SP1,
that's the cause.
- Ensure that services such as SQLadmin
[Monitoring], and the SQL instances for
Sharepoint and Monitoring are logging in under
local system. The application of SBS SP1 will
need rights to these MSDE instances and the
install will not run if 'log in under' is not
set as local system.
- Setup causes some uninterruptible power
supply (UPS) devices to switch to battery mode
during hardware detection. If a UPS device
switches to battery mode during hardware
detection, Setup may fail.
- If you have previously installed Sharepoint
services as a part of Small Business Server 2003
you will notice that there is a MSDE instance
called 'Sharepoint'. If you have decided that
you needed to move the data inside this instance
to an instance called 'MyCompany' and after this
you have deleted the Sharepoint instance, the
SP1 installer will report an error but at the
end of the installation sequence it will report
that the install was successfull. However, the
installation will not have completed
succesfully. No MSDE instance will be upgraded
to Service Pack 4 and other unexpected things
can occur.
The solution or
workaround
Before you install SBS
SP1 uninstall the Intranet from the SBS setup
and reinstall it. This will create a default
Sharepoint instance and set the Companyweb to
the Sharepoint instance. Be sure to backup your
old SQL instance before doing this.
- If you are running Trend a/v or any other
antivirus ensure you have disabled the antivirus
before installing this service pack. Go into
services and right click on properties and flip
to ‘disable’, unplug the Internet/RJ45
connection from the wall and reboot the server
to ensure antivirus is not in memory.
- Make sure you are logged in as the build in
Administrator before you try to install SBS SP1.
Even an user with full admin rights, won't be
able to install this servicepack. About 10
minutes into the install (after extracting the
pack etcetera), you will get the message that
only the build in admin can do this and you will
have to start all over again.
- If you did not install Outlook 2003 in the
Clientapps when you initially installed the
server, you must do that before you install the
service packs. If you install SBS SP1 without
Outlook in the Clientapps, you will get an error
message at the end of the SBS SP1 install. After
that you will see the message that the update
was successfully applied. After reboot review
the logfiles in the \Program Files\Microsoft
Integration\Windows for Small Business Server
2003\Logs. They will show you that the error was
with Outlook 2003.
- You need at least two Gb free space on the
boot drive. If you need stuff moved away
from the boot drive please refer to this article
http://download.microsoft.com/download/1/1/6/11671e4d-fb21-489c-870f-db36fd21a7d2/SBS_MoveDataFolders.DOC
- Review the group memberships of the
Administrator account. Click on Start,
Server Management, Users, click on Administrator
and review the “members of” tab. By
default, the administrator account should only
have memberships in the following groups:
- Administrators
- Domain Admins
- Domain Users
- Enterprise Admins
- Group Policy Creator Owners
- Mobile Users
- Schema Adminis
- And possibly Internet users [if ISA 2000 is
installed]
- You should NOT have membership in Power
Users.
- If you get an error during the installation
of Windows Small Business Server 2003 Update
KB891193 for Windows XP Service Pack 2 that the
system cannot find the path, you must have moved
the Clientapps folder to another location but
you did not change the path in the registry.
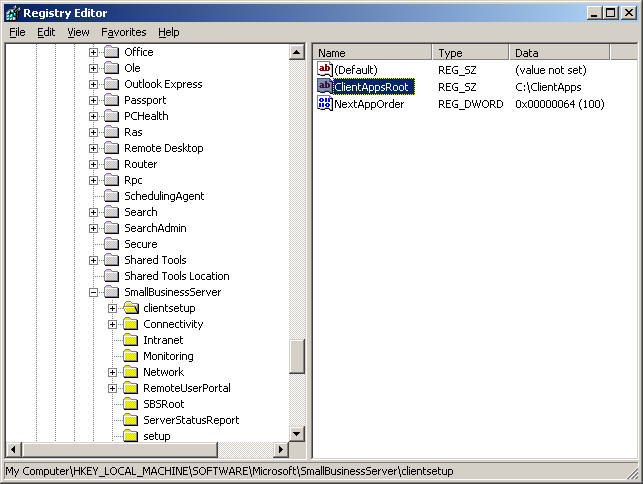
Take a look at this hive in the registry:
[HKEY_LOCAL_MACHINE\SOFTWARE\Microsoft\SmallBusinessServer\clientsetup]
"ClientAppsRoot"="C:\ClientApps"
If
you moved the Clientapps to drive D: the
ClientAppsRoot must point to the same place.
- Ensure that this server has not had an
Exchange Information Store transferred to it
from a previous server. If you performed
such a transfer as in swing migrations or other
disaster recoveries, please wait on installing
SBS 2003 SP1 until you review the
deployment issues at http://www.sbsmigration.com/
page which will be released shortly.
- Review and make sure that the Server
Management link is in the startup folder after
applying SBS SP1 and the reboot. IF IT IS
NOT, this may be an indication that the
installation was not successful. Please
review the install log files for error messages.
- If you renamed any .msi’s you may also
experience issues. It is important to
remember any customizations you may have done
and evaluate if they might be upgraded during
this service pack installation. If they will be
part of the upgrade and you have made
substantial modifications, the install may
indicate an error. Review the log files as
appropriate. An example of what can happen is
this:
You installed Group Policy
Management with Service Pack 1 and you renamed
the installer to gpmc1.02.msi. When applying SBS
SP1 you get an error.
More
information
If you look into
C:\Program Files\Microsoft Integration\Windows
Small Business Server 2003\Logs\SBSMSI-GPMC.LOG
you will notice an error like
this:
"MSI (s) (14:38)
[21:10:11:140]: Product: Microsoft Group Policy
Management Console with SP1 -- Error 1316. A
network error occurred while attempting to read
from the file:
e:\129a93311345b099711ded\cd3\sbs\GPMC\gpmc1.02.msi"
What
happens is that MSI installer remembers the last
name it installed from and it is looking for the
same name for the update which does not exist
and that causes the error. Please uninstall the
GPMC from add/remove programs. After you have
extracted SBS 2003 SP1 you install Group Policy
Management from the directory called CD3 and
then run SP1 for SBS 2003.
- If the install fails during the last patch,
disk 2, patch 5 [also known as KB885918 or the
Small Business Server sp1], we would recommend
that you call Microsoft customer support http://www.microsoft.com/services/microsoftservices/supp.mspx#small
and be prepared to send the following files in
for review: In the folder under Program
Files\Microsoft Integration\Windows Small
Business Server\ you will find the files:
Eventlog.txt,
Errorlog.txt and Setup.log.
- If during the installation of ISA 2004 you
get prompted with the message that ISA 2000
cannot be uninstalled because IISadmin cannot
shut down, DO NOT manually uninstall ISA 2000 as
is prompted on the screen. Change the iisadmin
service to disabled and reboot. Restart
the ISA Server 2004 installation
again. This will ensure that your ISA 2000
rulesets will be maintained and reimported back
in.
- Do not attempt to install ISA 2004
remotely. During the installation it will
disable the external nic and you will not be
able to remote to the machine in case of
issues. While the application of this
service pack is NOT supported in a remote
installation mode, the SBS 2003 standard portion
has been done by some remotely over a TS
session, however, plan accordingly should
something occur.
- Dutch, Portuguese, and Swedish Windows SBS
2003 SP1 Premium Edition customers can find
everything they need to know about upgrading the
WMSDE instance to full SQL used for Windows
SharePoint Team Services with this step-by-step
document: http://www.microsoft.com/downloads/details.aspx?familyid=a1876820-0154-44f9-a570-a6e1fdbf995e&displaylang=en.
Installing Small Business Server 2003
Service Pack is a 5 step procedure for the
Standard version and a 7 step
procedure for the Premium version. The following
steps are involved:
- Download and install
Windows 2003 Service Pack 1.
- Download and install
Windows SharePoint Services 2.0 Service Pack 1.
- Download and install
Windows Small Business Server 2003 Update
KB891193 for Windows XP Service Pack 2.
- Download and install
Exchange Service Pack 1.
- Download and install
Windows Small Business Server 2003 Service Pack
1.
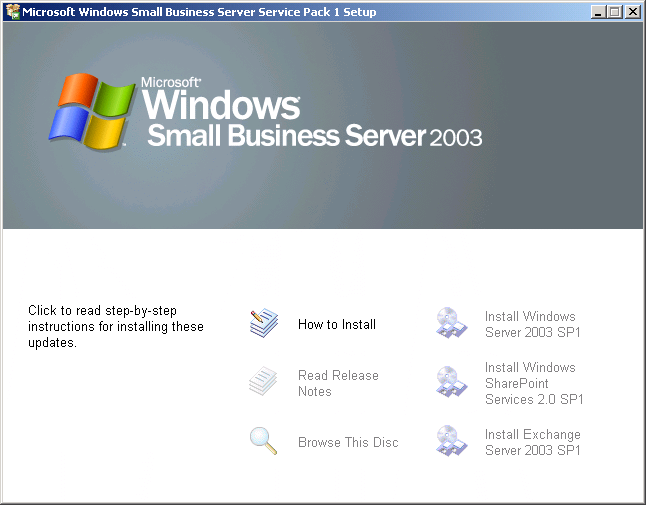
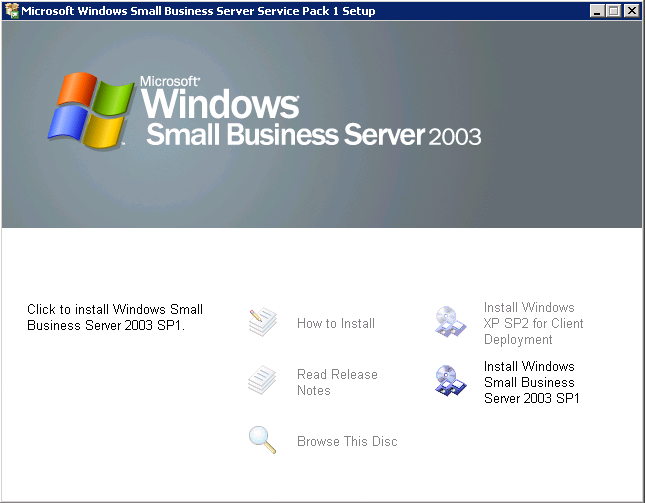
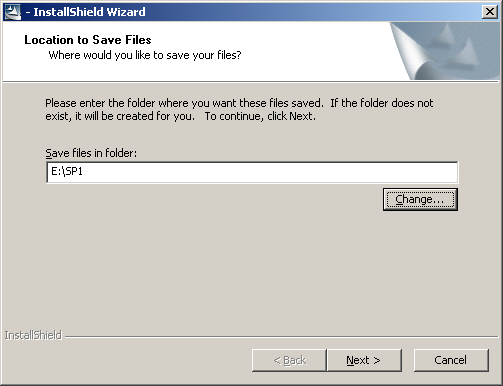
If you have downloaded the above service
packs copy them to a folder named SP1. If you
install from CD just pop in the CD and autorun
will present you the first screen:
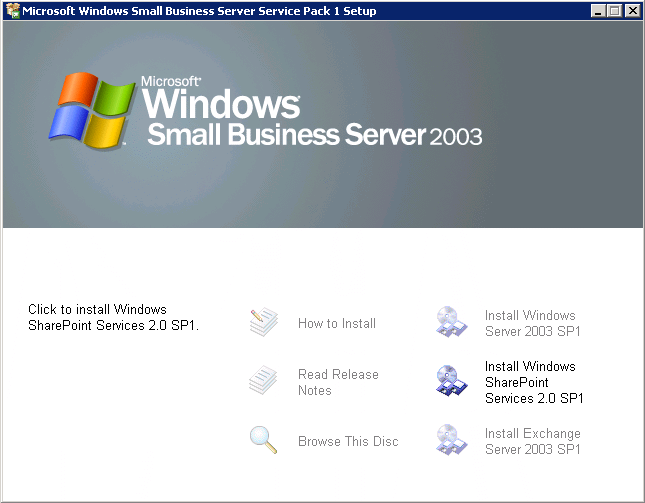
In Windows Explorer, open the SP1 folder,
and then double-click
WindowsServer2003-KB889101-SP1-x86-ENU.exe.
Below you will see a range of screen shots that
will show you what to expect. If you install
from CD just pop in the CD and autorun will
present you the first screen:
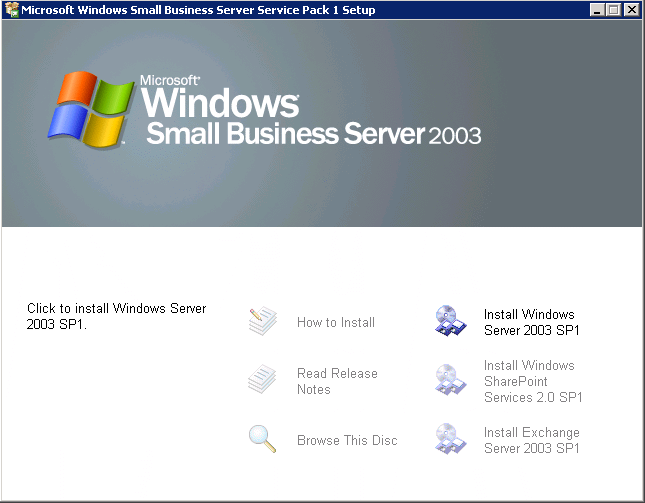
Choose to
install Windows Server 2003 Service Pack
1.
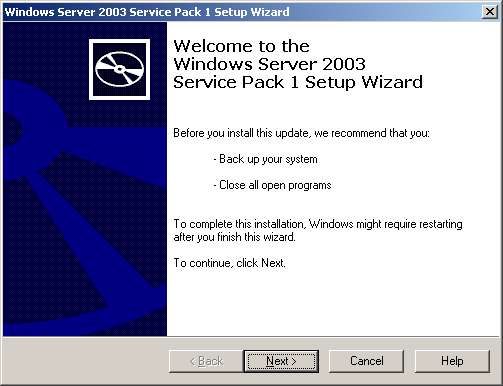

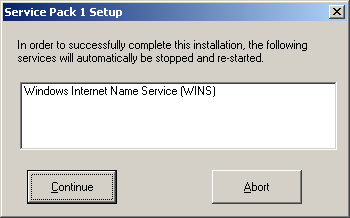
You will be
asked to stop the Windows Internet Name Service,
please click Continue. It can take a while
before setup continues, this is normal
behavior.
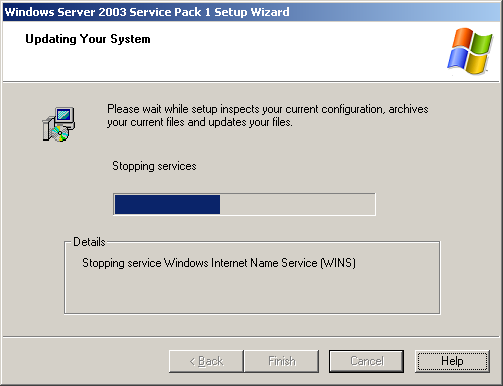
Windows
Internet Names Service (WINS) is
stopped.

Setup
continues...
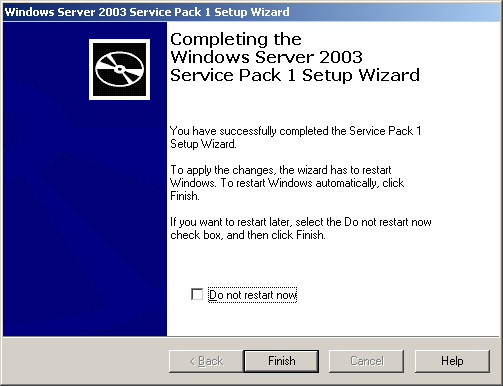
You must reboot
your server before you can continue.
In Windows
Explorer, open the SP1 folder, and then
double-click
SBS-WSS2003SP1-kb841876-fullfile-enu.exe. Below
you will see a range of screen shots that will
show you what to expect. If you install from CD
just pop in the CD and autorun will present you
the first screen:
Choose to
install Windows Sharepoint Services 2.0 Service
Pack 1
- Follow the instructions on the screen shots
to see how this is
completed.
Note
If
the Repair or Reinstall Microsoft SharePoint
Services 2.0 page appears, it indicates that
this update has already been installed on the
server. It is not necessary to repair or
reinstall the update. Click Cancel, and proceed
with the next instruction.
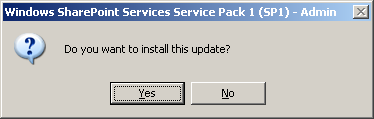
Click
Yes.
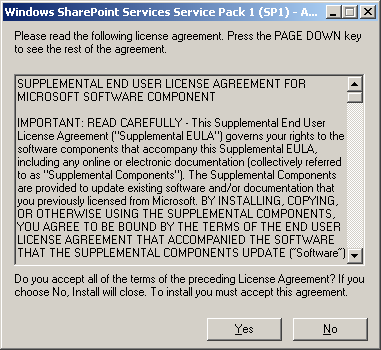
Click Yes to
accept the EULA.
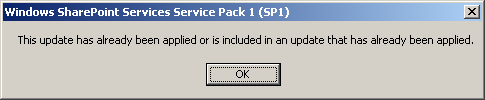
Aha, surprise!
In most cases Windows Sharepoint Services
Service Pack 1 is already installed on the
server. Click OK to continue and setup will
exit. It will continue when you did not have the
service pack installed!
In Windows Explorer, open the SP1 folder,
and then double-click
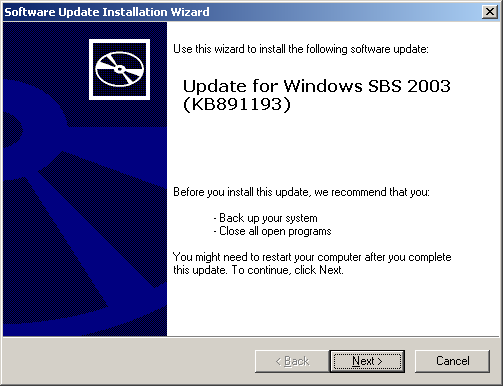
SBS2003-KB891193-X86-ENU.EXE. Below you will see
a range of screen shots that will show you what
to expect. This service pack will install
Windows XP Service Pack 2 on your server in the
ClientApps folder. It also modifies settings so
that this Service Pack is automatically pushed
to Windows XP clients who do not yet have
Windows XP Service Pack 2 installed. After this
service pack has been installed, you can remove
the folder and contents where Windows XP Service
Pack 1 is installed
(\Clientapps\wxpsp1).
If you install from
CD just pop in the CD and autorun will present
you the first screen:
Choose to
install Windows XP Service Pack 2 for Client
Deployment.
You will see the
extraction window if you install from a
download.
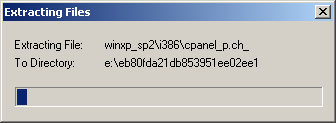
The Service
Pack is extracting files to your
server.
Choose Next to
continue.
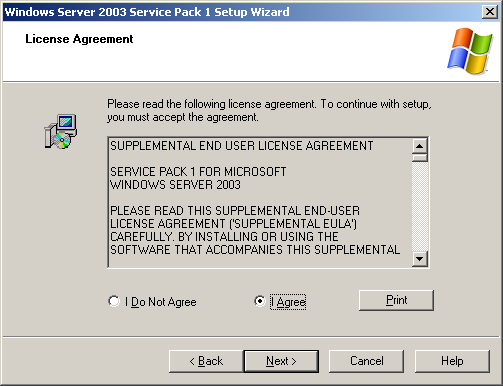
Click Agree and
choose Next.
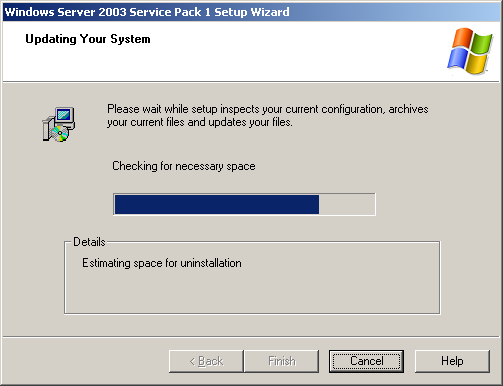
Setup is
investigating your system.

Setup is
continuing the installation, click OK when
setup has finished installing this service
pack.
In Windows Explorer, open the SP1 folder,
and then double-click E3SP1ENG.exe. Below you
will see a range of screen shots that will show
you what to expect. You don't have
to install Exchange Server Service
Pack if you already installed this
service pack in the past, but if you install it
again it won't do any harm. If you install from
CD just pop in the CD and autorun will present
you the first screen:

Choose to
install Exchange Server 2003 Service Pack
1.
Installing from the downloaded
files:
- In the Unzip To Folder dialog box, type the
location of the SP1 folder, and then click the
Unzip button.
- When the self-extraction process is
complete, click OK, and then click Close.
- In Windows Explorer, double click the
E3SP1ENG folder, double-click the setup folder,
and then double-click the i386 folder.
- Double-click Update.exe, and then follow the
instructions on the
screen.
Note:
A
warning appears informing you of a compatibility
issue with this version of Windows. This warning
does not apply to Windows Small Business Server
2003 installations. When the warning appears,
click Continue.
Extract
Exchange Service Pack 1 by double clicking
E3SP1ENG.exe to your folder called
SP1.
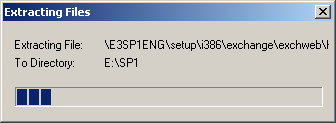
The files are
being extracted to folder SP1. This can take a
while to complete. In Windows Explorer, double
click the E3SP1ENG folder, double-click the
setup folder, and then double-click the i386
folder.
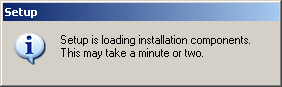
Be
patient...
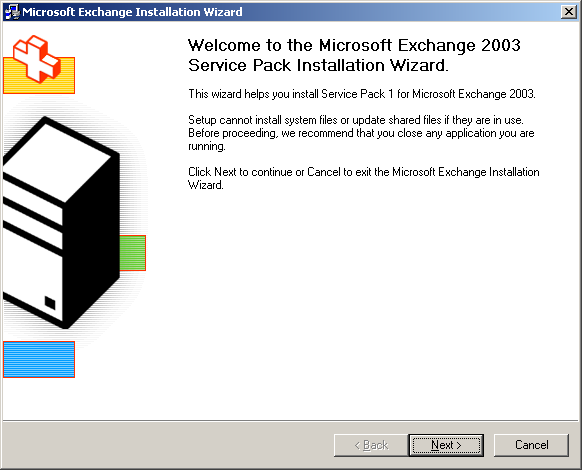
Setup has
started. Click Next.
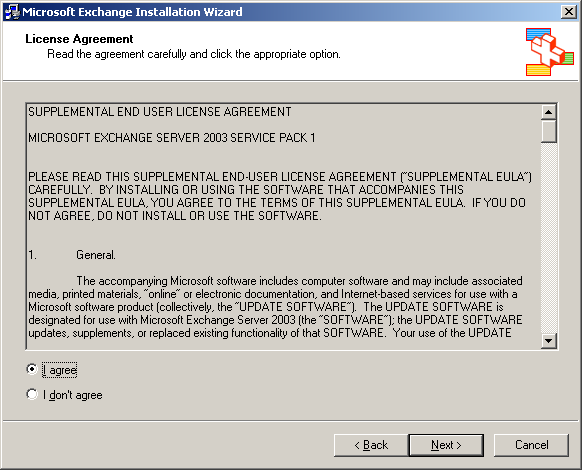
Accept the EULA
and click Next.
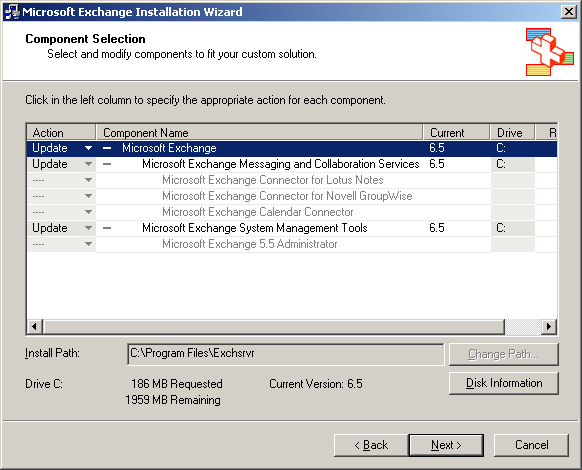
Be sure to
check that all choices are set to 'Update'. This
is the default setting.
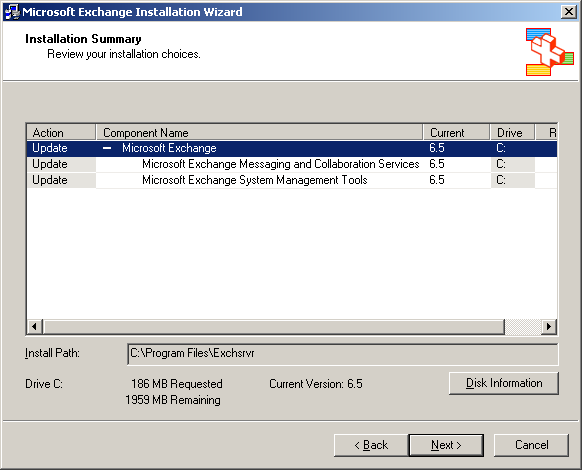
A summary of
the choices you made.
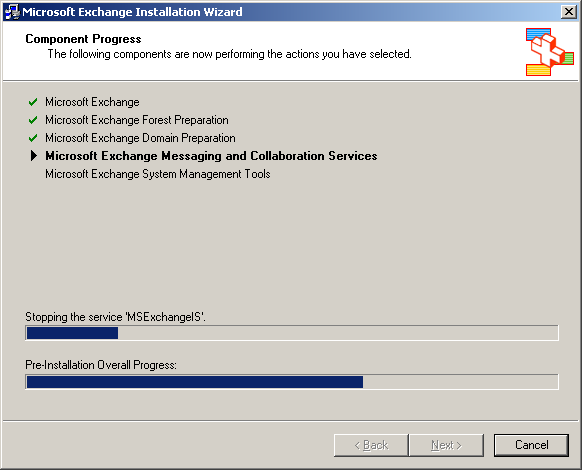
Setup has
started the installation of Exchange Service
Pack 1.
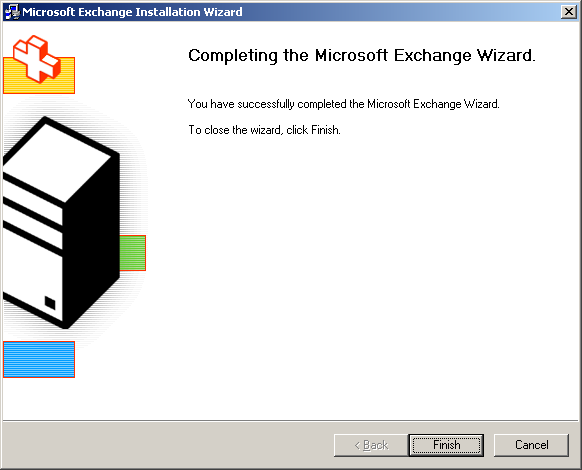
Setup has
finished the installation of Exchange Server
2003 Service Pack 1. Click Finish. If you are
prompted to reboot the server you must do
that.
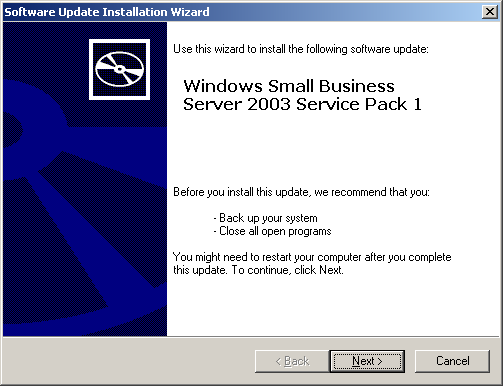
In Windows Explorer, open the SP1 folder,
and then double-click
SBS2003-KB885918-SP1-X86-ENU.EXE. Below you will
see a range of screen shots that will show you
what to expect. Windows Small Business Server
2003 Service Pack 1 updates SBS 2003 specific
components like the Wizards you use to configure
Internet access (
CEICW). It also updates the
MSDE instances for Monitoring and Sharepoint to
Service Pack level 4.
If you install from
CD just pop in the CD and autorun will present
you the first screen:
Choose to
install Windows Small Business Server 2003
Service Pack 1.

Setup is
extracting the service pack files. If you are
installing from CD you will not see this happen,
this will only happen if you have downloaded
Small Business Server 2003 Service Pack 1
from Microsoft.
Setup has
started the installation.
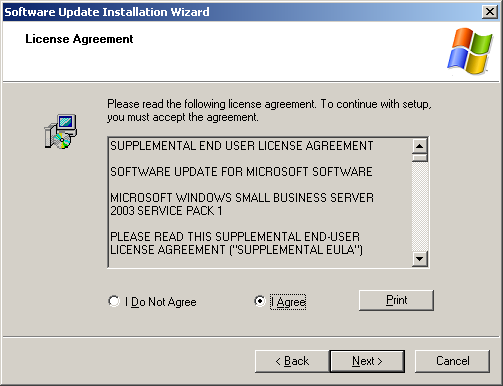
Accept the EULA
and click Next.
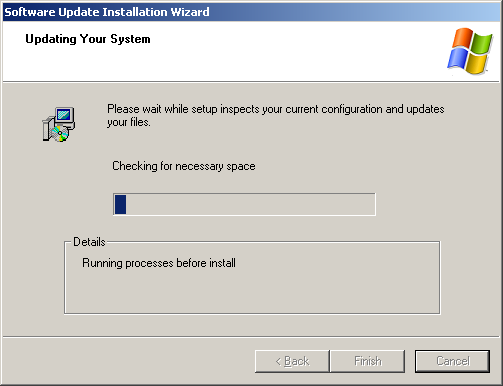
Setup is
inspecting your server.
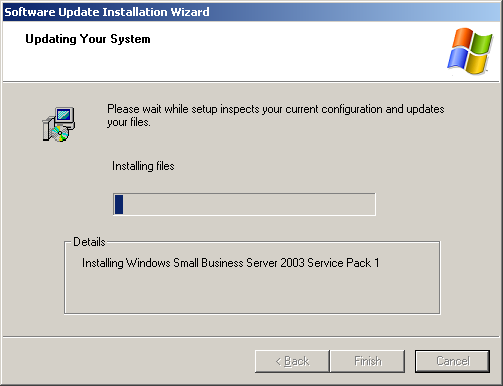
Setup started
the installation of Small Business Server 2003
Service Pack 1.
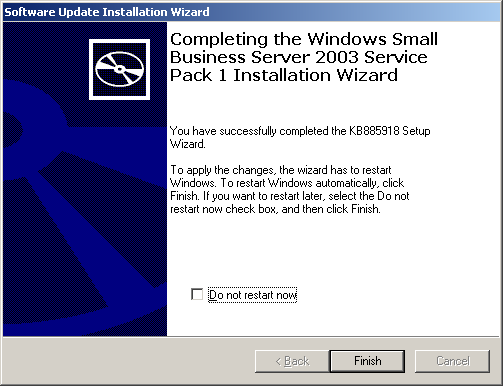
Click Finish
and your server will be rebooted.
- Install ISA Server 2004 (SBS 2003 Premium
only). You cannot download ISA Server
2004 with SP1, you must order the CD from
Microsoft. Do NOT try to install any other
version then from the original SBS 2003 SP1
Premium CD, because there are scripts necessary
to move the old settings from your ISA Server
2000 installation.
- Download and install SQL
Server Service Pack 4 (SBS 2003 Premium
only).
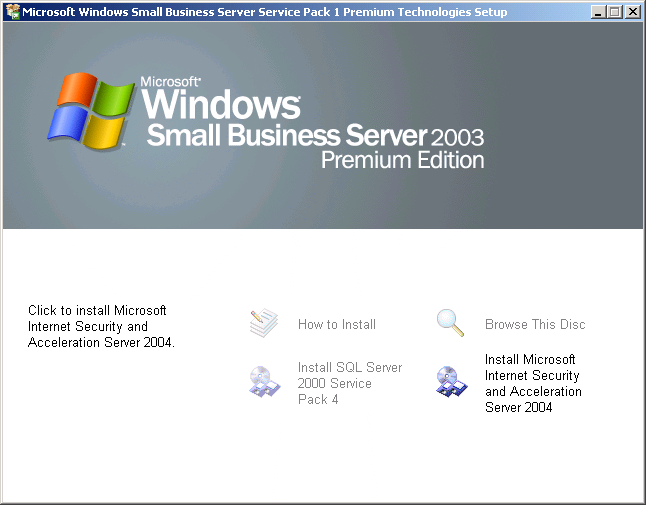
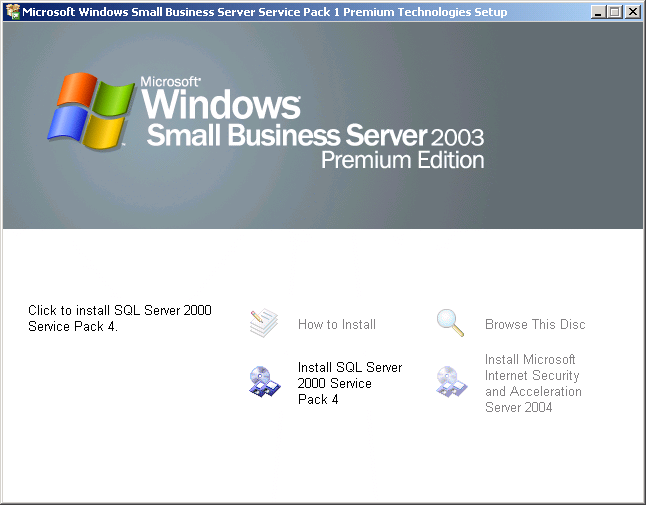
Put the SBS 2003 Premium CD in your CD
drive and double click it. Choose to install ISA
Server 2004 with Service Pack 1. Below you will
see a range of screenshots that will show you
what to expect. If you install ISA Server 2004
with SP1 it will install a MSDE instance that
will automatically be upgraded to MSDE
Service Pack 4. If you install from CD just pop
in the CD and autorun will present you the first
screen:
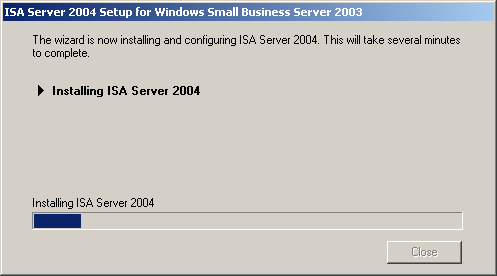
Choose to
install Microsoft Internet Security and
Acceleration Server 2004. The installations
includes ISA Server 2004 Service Pack 1 and a
MSDE Instances with Service Pack 4
installed.
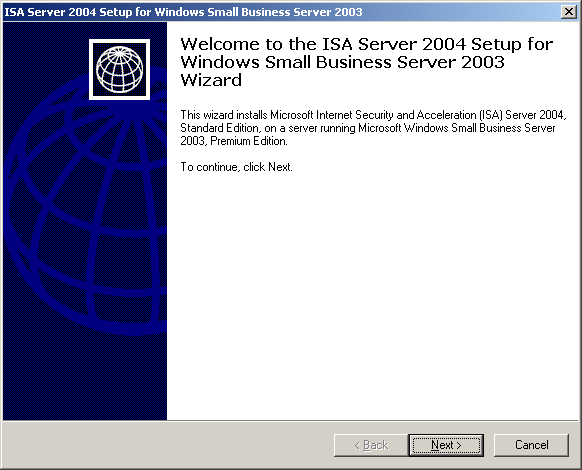
Setup informs
you that this is a special installer for Small
Business Server 2003. This is the reason why you
should only install from the official SBS 2003
Premium CD and NOT from any other
source.
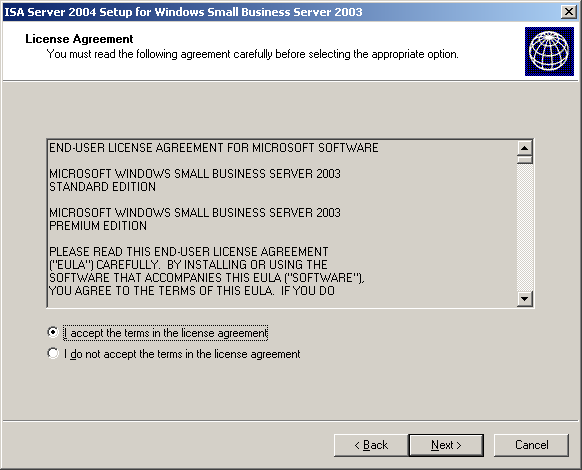
Accept the EULA
and click next.
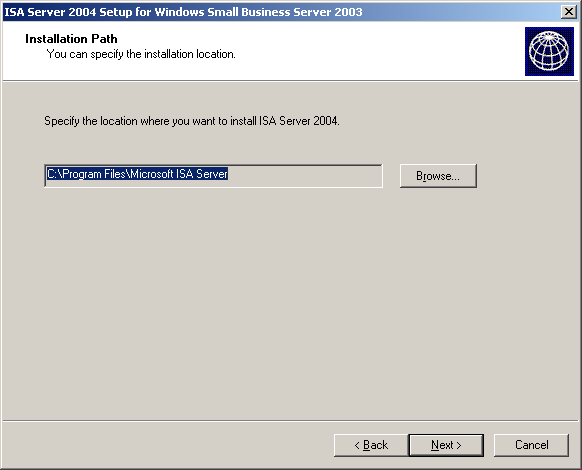
Accept the
default location for installation but if you
wish you can change this.
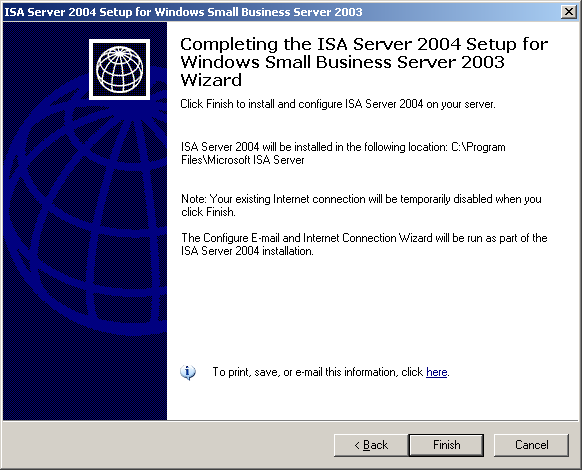
Setup is ready
to install ISA Server 2004 with Service Pack 1
on your server, click Finish.
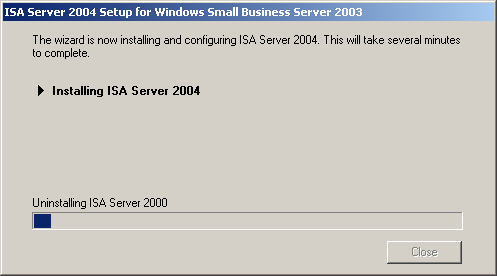
Setup has
exported your current ISA Server 2000
settings and will uninstall ISA Server
2000.
Setup is
installing ISA Server 2004 with Service Pack
1.
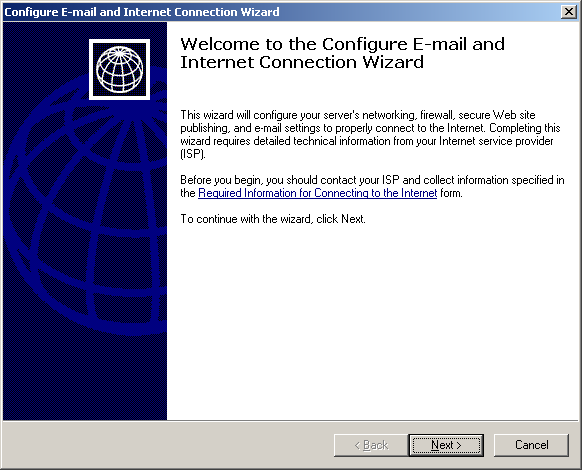
Setup has
finished the installation of ISA Server 2004
with Service Pack 1 and prompts you to run the
Configure E-mail and Internet Connection Wizard.
Click Next. For more details on how to configure
your server for Internet access please follow
the instructions in:
How to configure the server for
Internet access. After you have
configured the server for Internet Access, setup
will continue.
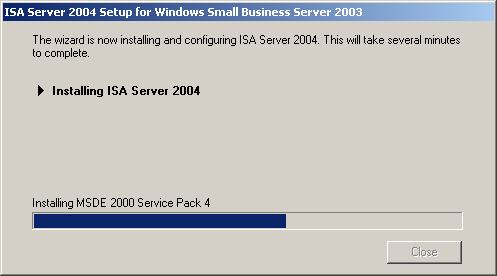
Setup will
install a MSDE instance for you for logging
purposes. Logging in ISA 2004 with Service Pack
1 is extremely improved compared to ISA Server
2000.
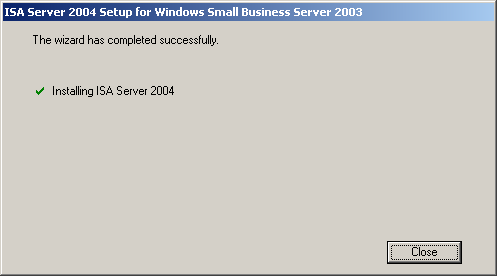
Setup has
finished installing ISA Server 2004 with Service
Pack 1, click Close.

You are
informed that you must reboot the server, click
OK to reboot the server.
The two MSDE instances, SBSMONITORING
and SHAREPOINT are upgraded by Small
Business Server 2003 Service Pack 1. If you
upgraded the Sharepoint Instance to full blown
SQL you must upgrade this instance to SQL Server
2000 Service Pack 4. You cannot upgrade both at
the same time, you need to upgrade one by one.
If you have more SQL instances upgrade those
too. In Windows Explorer, open the SP1 folder,
and then double click
SQL2000-KB884525-SP4-x86.EXE.
Extract the
contents to the SP1 folder.
Click Finish.
Browse to the SP1 folder and double click
'setup.bat'. If you install from CD just pop in
the CD and autorun will present you the first
screen:

Click
Next.
Click Yes to
accept the EULA and continue setup.
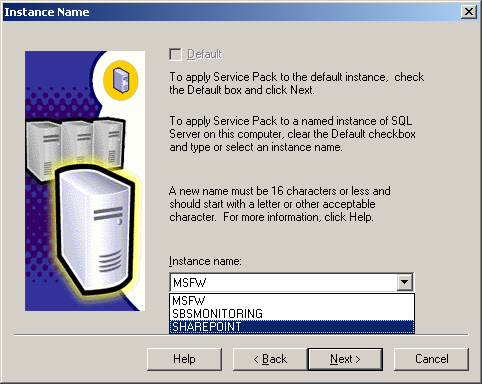
This is an
important window. You must now choose which
instance you are going to upgrade to SQL Service
Pack 4. The instances MSFW and SBSMONITORING are
already upgraded to service pack 4 by the ISA
Server 2004 with Service Pack 1 installer (this
installs a MSDE instance with SP4) and SBS
Monitoring has already been upgraded when you
installed Small Business Server 2003 Service
Pack 1.
In our pre SBS SP1 installation
we upgraded the Sharepoint instance to full SQL
because we wanted to enjoy Full Text Search in
Sharepoint. Conclusion is that we need to
install SQL Service Pack 4 on the Sharepoint
instance. If you have any other SQL instances
installed you must install SQL Service Pack 4 on
these instances too. You cannot choose more then
instance. To install SQL Service Pack 4 on
another instance you must run setup
again.
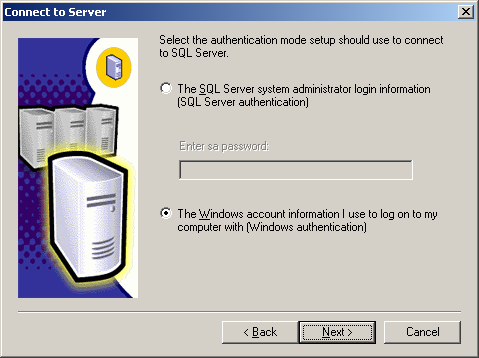
Accept the
default settings.
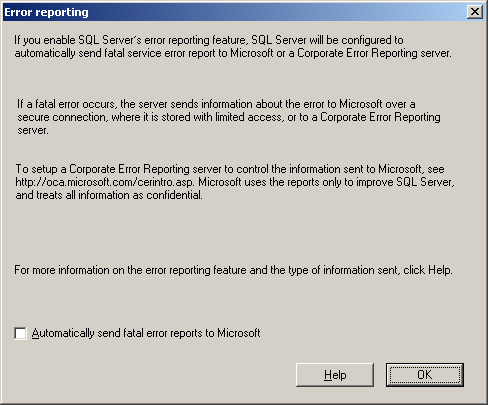
You can choose
to send fatal errors to Microsoft for research,
click OK.
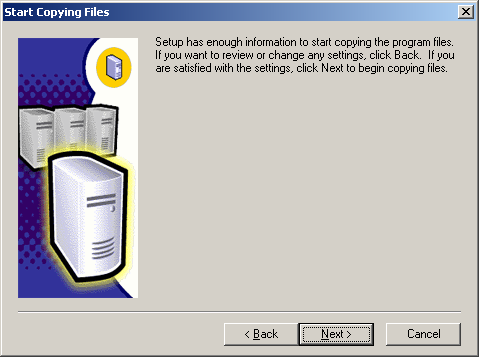
Setup informs
you that it has enough information to install
SQL Service Pack 4, click Next.

Setup is
copying files to your servers hard
drive.
Setup is
running several scripts to update your SQL
instance to SQL 2000 Service Pack 4.
Setup
continues....
Aha, there is
the upgrade for Full Text Search.
Registering
ActiveX...
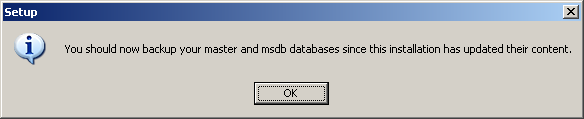
Setup informs
you to make backups. Click OK.
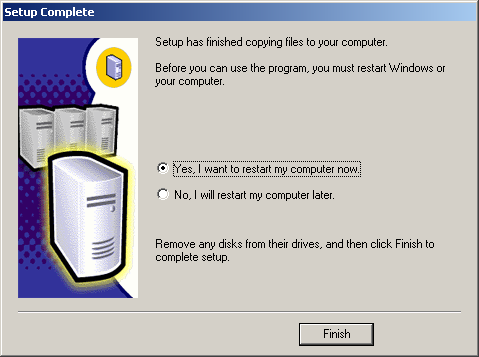
Click Finish to
reboot the server. Now you are done with
installing SQL 2000 Service Pack 4 and
you have completed the installation of all
service packs for Small Business Server
2003!
The Security Configuration Wizard, which is
included in Service Pack 1 for Windows Server
2003, was not designed to work with Windows
Small Business Server 2003. Running this wizard
can create conflicts with settings that are
configured by Windows Small Business Server 2003
Setup.
To help secure a computer running Windows
Small Business Server 2003, it is recommended
that you accept the default settings during
Setup, and then run the Configure E-mail and
Internet Configuration Wizard. If you run the
Security Configuration Wizard on Windows Small
Business Server 2003 and experience problems,
use the rollback feature in the Security
Configuration Wizard to undo the changes.
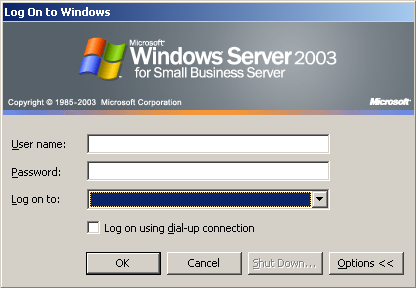
- When the server has rebooted from installing
the Small Business Server Service Pack 1, the
login entries are totally blank. You have
to type in "Administrator" and the domain name
is flipped to 'blank". Click on options to
show the 'Log on to:' and click in the dropdown
box to select the domain.
- Re-enable antivirus.
- Send test messages/emails, internal as well
as external.
- Check event logs.
- Check if all services that should be
running, are running. Most probably you will get
an error message before login if a service has
failed. The eventlogs will tell you which
service failed.
- Check printing.
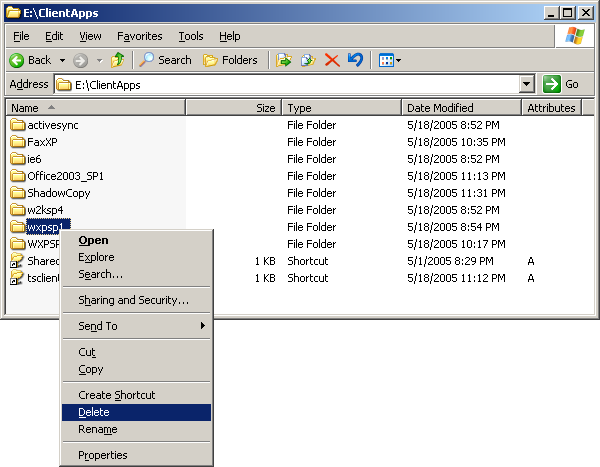
- Cleanup the Clientapps folder. You can
delete the folder that contains Windows XP
Service Pack 1 (\Clientapps\wxpsp1).
- Download and install
Microsoft Baseline Security Analyzer V1.2.1. Run
a security check on your system! Microsoft
Baseline Security Analyzer V1.2.1 will report
any missing service packs or security patches.
- Be sure you review the revised restoring
your server notes in the SBS 2003 SP1. You
will now need to apply SP1 on Windows 2003
Server before restoring the server. If you
restore your server after you have applied the
service packs you must install Windows 2003
Server Service Pack 1 before you
can do a disaster restore. For more
information on Backup and Restore download the
most current version of "Backing up and
Restoring Windows Small Business
Server 2003", see the Microsoft Web site at
http://go.microsoft.com/fwlink/?LinkId=39741.
- It now appears that SBSbackup does full SQL
backups and there is no need to adjust the SQL
databases to ‘simple’ in order to backup SQL
server.
- After the install, if you have SUS installed
on the SBS 2003 sp1 server you will now see
error codes 1001 and 1004 in the event viewer
indicating issues with WU MSInstaller. The
issues can be safely ignored. There
will be an upcoming Knowledge base
article for this.
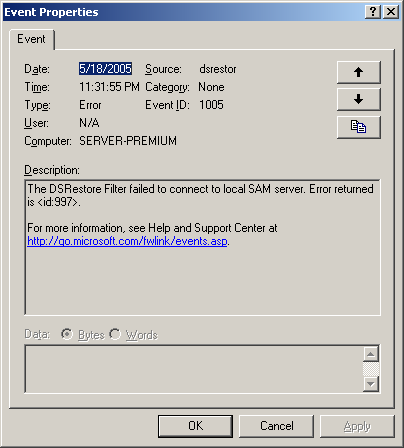
- After the installation of Windows 2003 sp1,
you will see an error message “The DSRestore
Filter failed to connect to the local SAM
Server. Error returned is <id:997>",
this is an event caused by Windows 2003 SP1.
If you change
the Administrator password ‘after’ the
application of SBS 2003 SP1 [which includes
Windows 2003 SP1] the Administrator password
will no longer sync automagically with the DSRM
password and we are now like ‘normal’ Windows
Server in this behavior. It can however, be
manually adjusted following this KB: http://support.microsoft.com/default.aspx?scid=kb;en-us;322672.
We expect to have a windows update-able fix for
this issue at a later date.
- ISA Server 2004 with Service Pack 1 will
report an error that a Web Publishing rule is
invalid. This happens if you published the
companyweb in your pre SP1 SBS 2003 according to
How to
publish http://Companyweb to the Internet by
using ISA Server 2000 on a server that is
running Windows Small Business Server 2003,
Premium Edition. This rule is
called ISA22 and you need to delete that rule.
- Network attached devices such as scanners
may need ISA rules built. We found that we had
to enable internal FTP traffic to the network
for ISA 2004. We had to build a rule set, one
for inbound port 21 to the server. [at this time
my Konica scanner only supports FTP to server,
the Ricoh's will support SMB to Windows 2003
server in about a month].
- If you are seeing an error 14079 from ISA
Server 2004, this can be ignored at this time
[see KB 840180 - You receive a false positive
Firewall service error message on your ISA
Server 2004 computer: http://support.microsoft.com/Default.aspx?scid=kb;en-us;840180.
You may also want to remove the monitoring from
add/remove programs and reinstall it and see if
that clears up the issue.
- If after the installation of the service
pack you receive “allocated memory alerts”
review the instructions at http://msmvps.com/bradley/archive/2005/02/04/34984.aspx
and consider “throttling” the ISA instance as
follows:
Open a command prompt and type
in the following instructions:
- Osql –E –S %computername%\MSFW
- sp_configure ‘show advanced options’,1
- reconfigure with override
- go
- sp_configure ‘max server memory’,NNNN (Where
NNNN is the amount of ram in mb.
Recommended amount is 100 MB for SBS)
- reconfigure with override
- go
- exit
HOME